
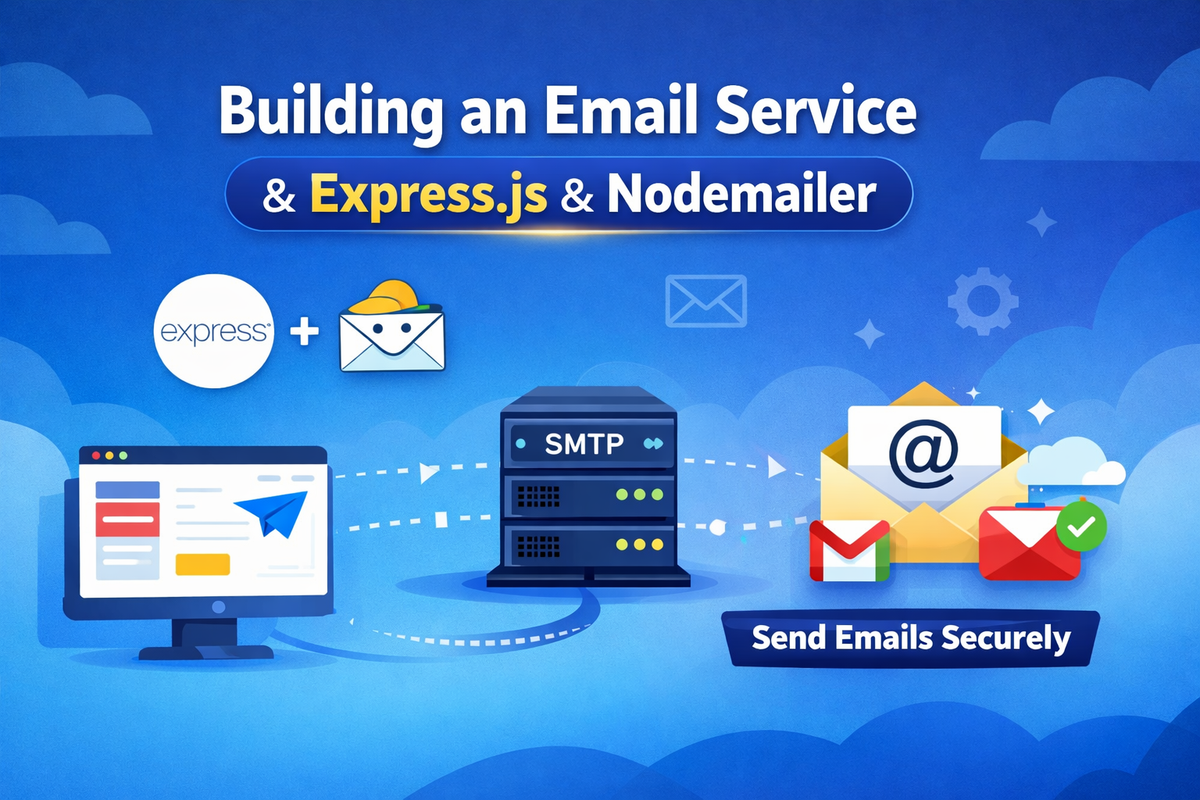
Email Service using Express
Learn how to build an email service using Express.js and Nodemailer. This beginner-friendly guide explains SMTP, transporters, app passwords, and secure email delivery step by step.
Almost every web application uses email sending features, whether it is for user feedback, a contact form or customer support, or users creating a new account. Here on this blog, I will guide you on how you can create your own email service application with Express.js as a medium. Whether you already work with Express.js or not, I will guide you on the simplest way how you set up your email services using Express.js.
Before we begin, here is a package that I am using for this project:
npm install express nodemailer dotenv
npm install -D typescript ts-node-dev @types/express
using npm
yarn add express nodemailer  dotenv
yarn typescript ts-node-dev @types/express -D
using yarn
Propose about packages:
Express: To create an HTTP server and APIs.
Nodemailer: To handle email delivery via SMTP or other transport mechanisms.
DotEnv: To keep sensitive information out of code. Store it in .env.
Typescript: To enhance code quality
Ts-node-dev: To monitor the project’s file changes and automatically restart the Node.js process when a required file is modified.
@types/express: To provide TypeScript support for Express
Folder Structure For Email Services
email-service/
├── src/
│ ├── controllers/
│ │ └── mail.controller.ts
│ │
│ ├── routes/
│ │ └── mail.routes.ts
│ │
│ ├── services/
│ │ └── mail.service.ts
│ │
│ ├── config/
│ │ └── smtp.config.ts
│ │
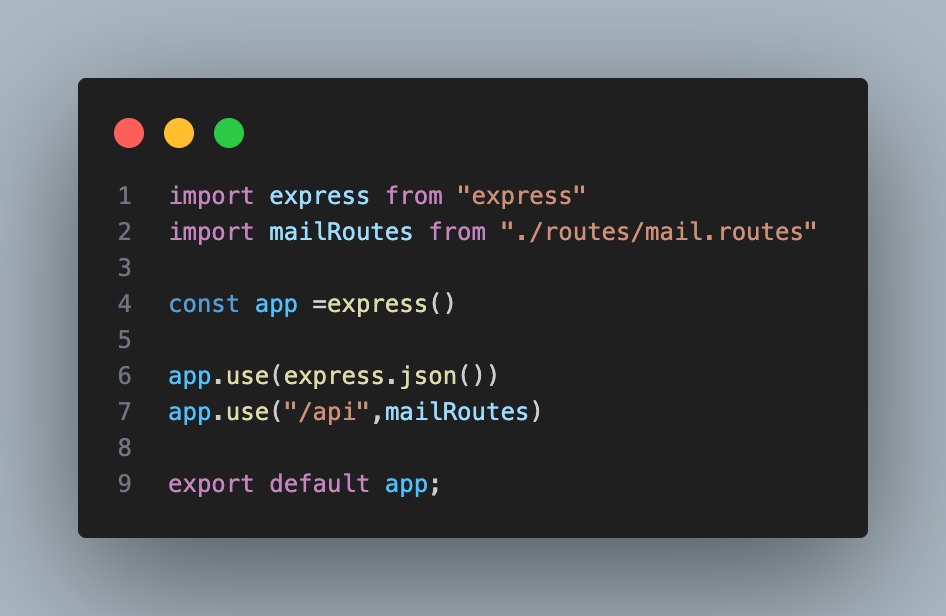
│ ├── app.ts
│ └── server.ts
│
├── .env
├── package.json
├── tsconfig.json
└── README.md- controllers: To handle request/response.
- services: To handle business logic.
- config: To store configuration files for the transporter.
- routes: To store the endpoint of email services.
- app.ts: To configure the application using Express.
- tsconfig.json: configuration file for the TypeScript compiler (tsc).
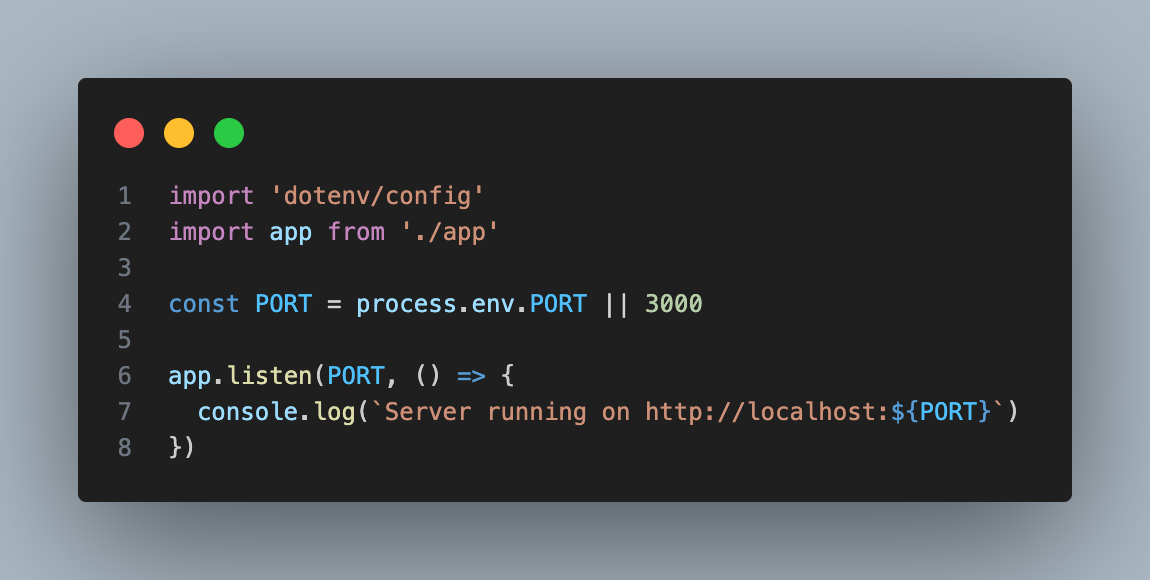
- server.ts: To start the backend server.
Understanding How Email Services Work
Before starting with email service implementation, it's important to understand how email services actually work behind the scenes. To understand that we need to know two key concepts:
What is Transporter, and why do we need it?
Transporter is an engine that work as a mailman in our application to communicate with the SMTP server. Without transporter our application cannot send mail to any other mail server. Transporter holds all the necessary information that is required for the application to connect it with other server. To configure the transporter, we need to know about SMTP.
What is SMTP?
SMTP stands for simple mail transfer protocol, just like its name, SMTP works as a mediator to send an email message form app/server to the recipient’s email server. SMTP is commonly used together with IMAP or POP3, which are used to read/retrieve emails, but for now, we’ll skip it and focus only on sending emails using SMTP. Here is a small workflow of the SMTP server that helps to understand how the SMTP server actually works:
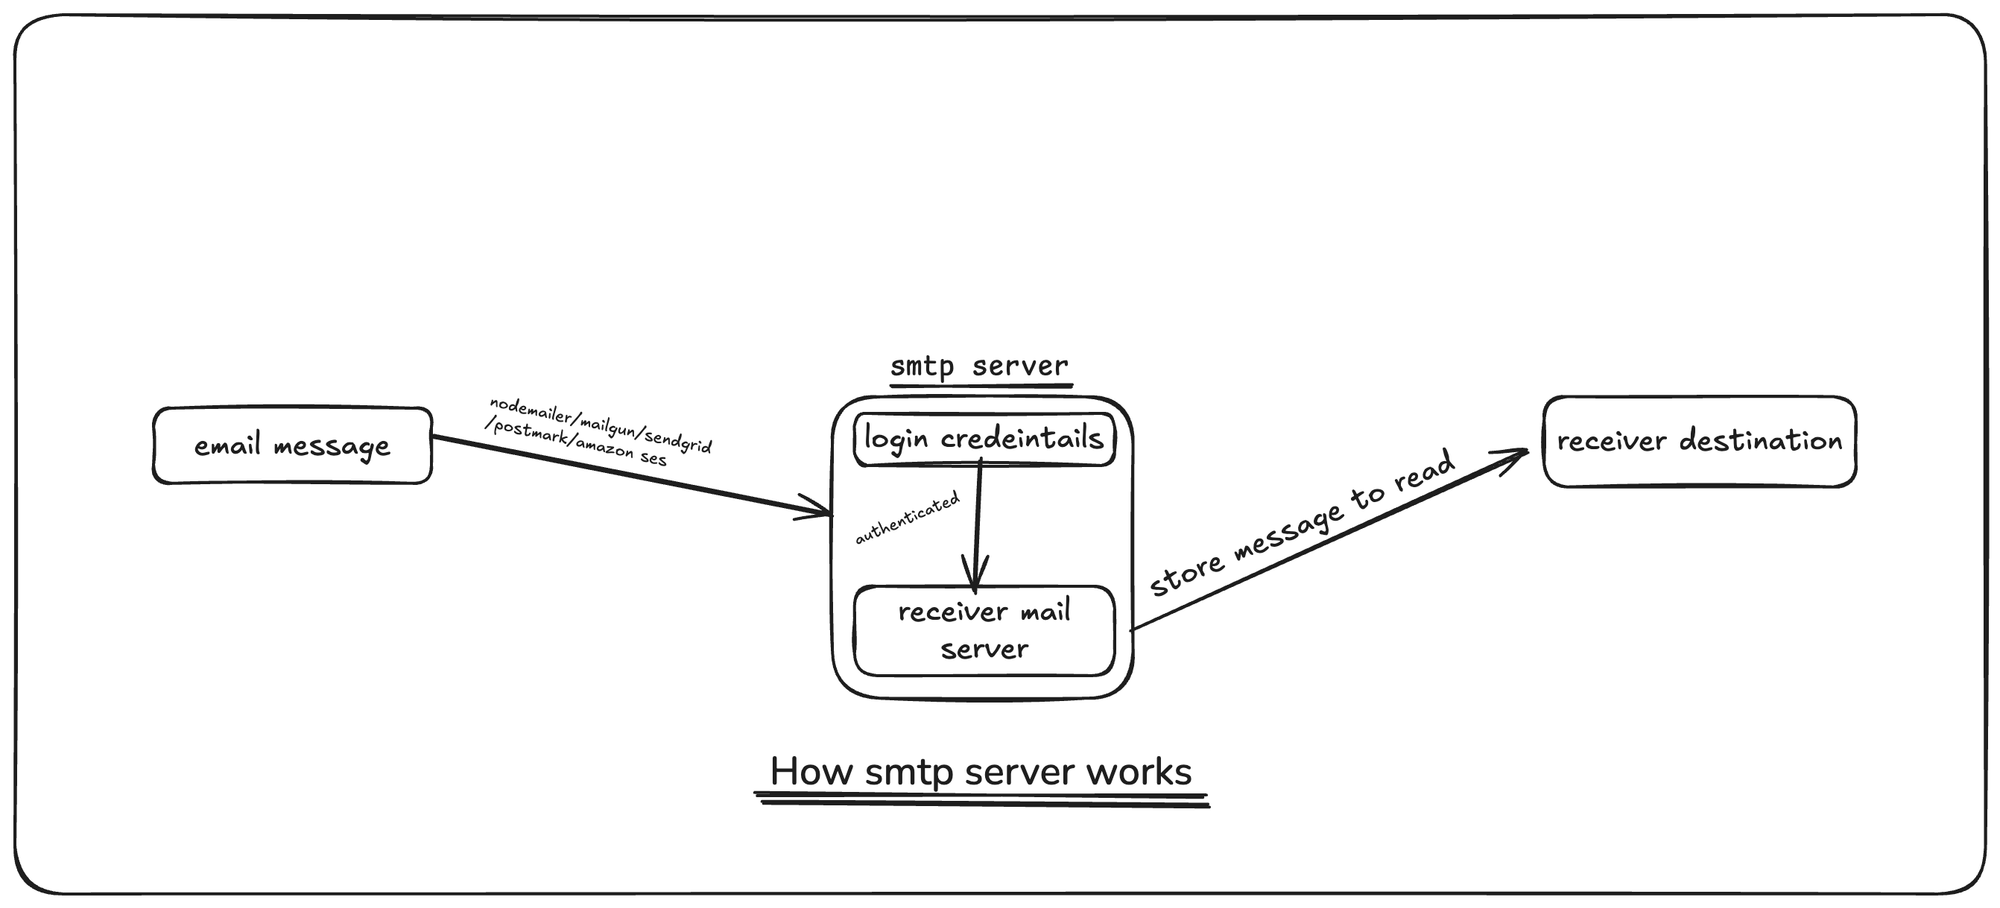
The above diagram shows the flow of how an SMTP server works while sending an email from an application. A mailing library or service such as Nodemailer, Mailgun, SendGrid, Postmark, or Amazon SES is used to connect the application to an SMTP server, which authenticates the application using login credentials . Once authenticated, the SMTP server delivers the email to the receiver’s email server. Then the receiver's mail server stores the email, allowing the user to read it from their inbox.
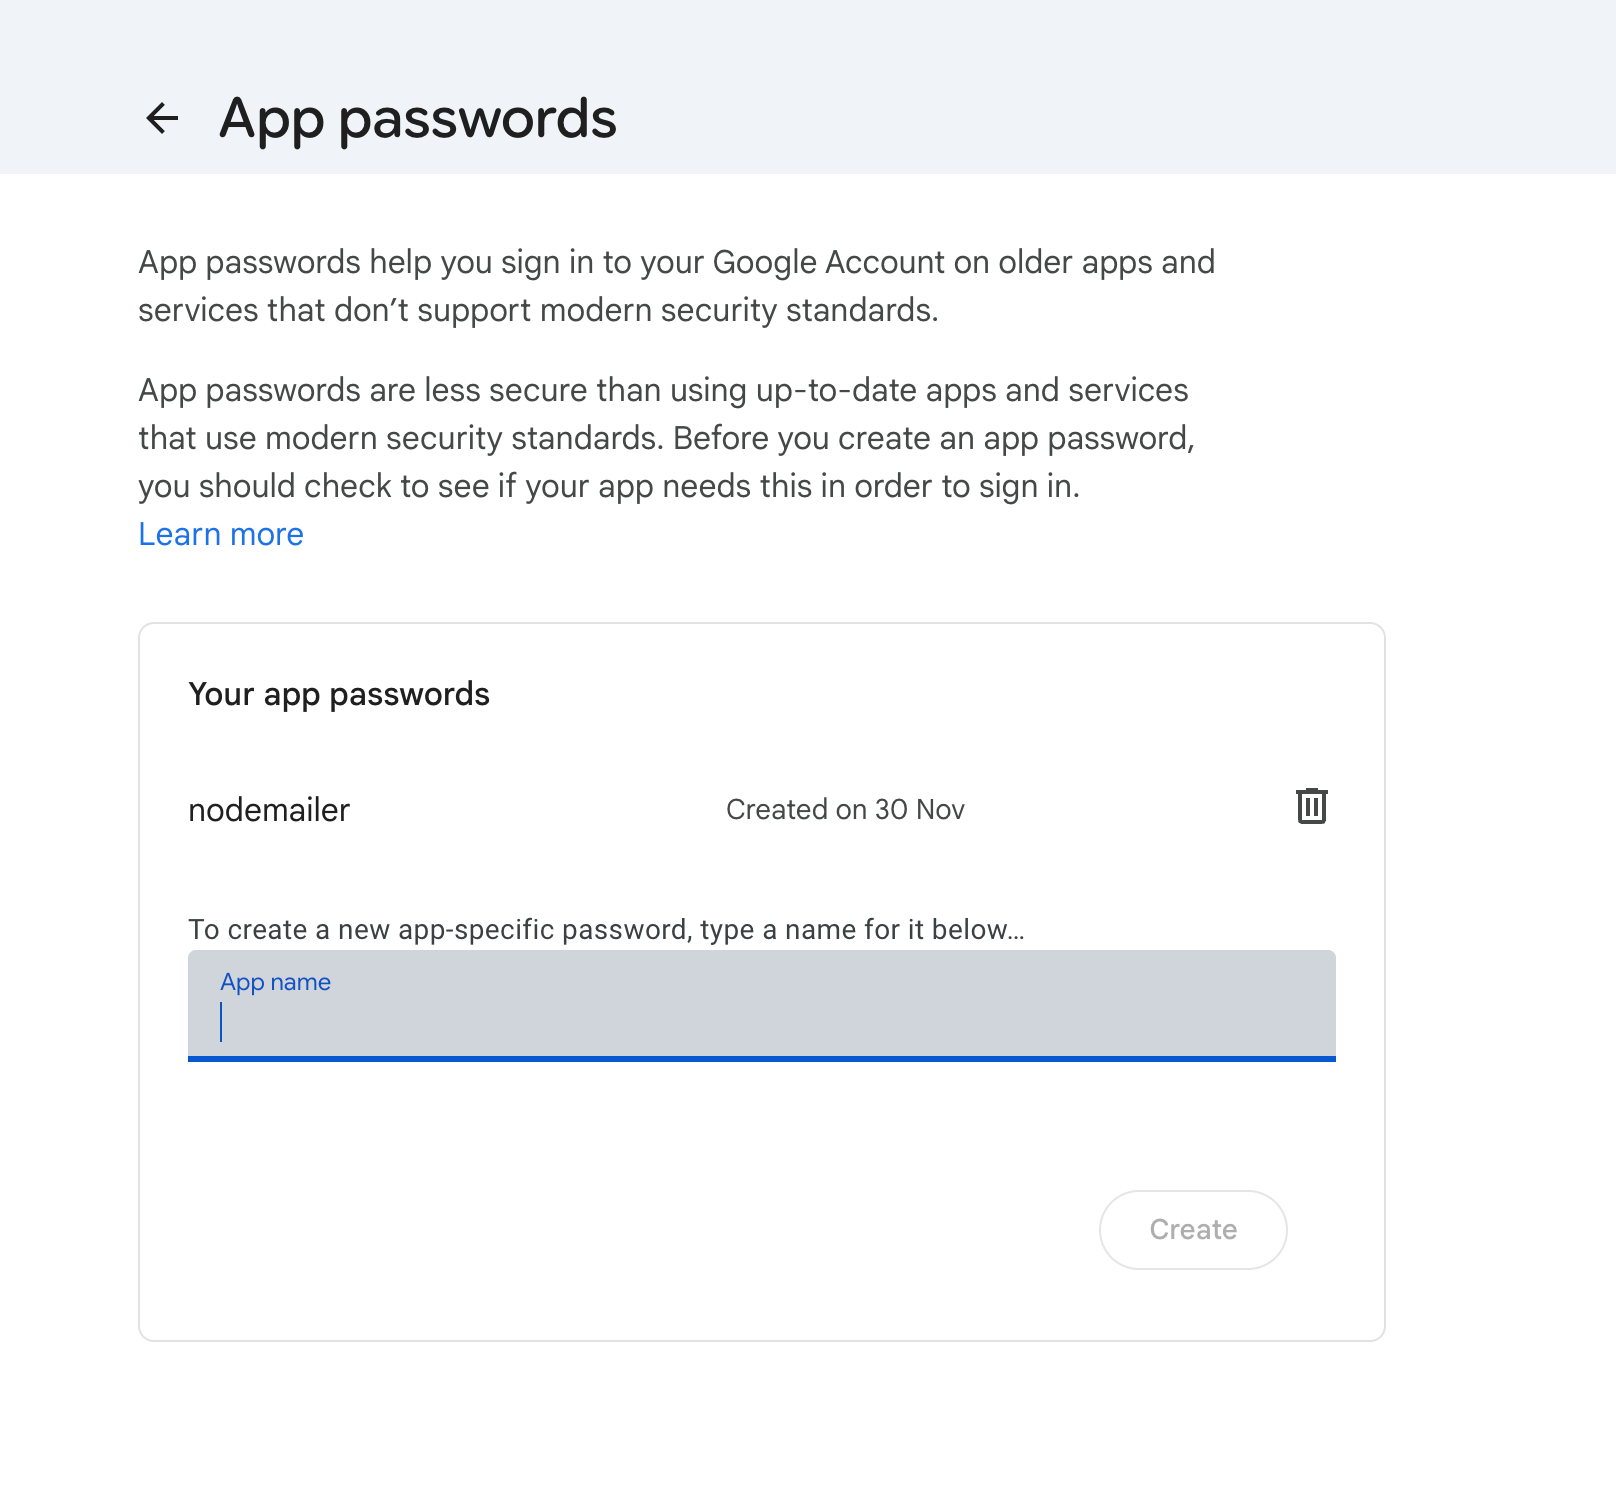
IMPORTANT: Generate App Password
(While using Gmail smtp server and Nodemailer)
Using an app password is not always required for all email services. But it is one of the special, auto-generated passwords created by email service provider like Gmail, Yahoo, or Outlook that allows an application to access your email securely without using your main account password. App password can be used when your email account hat 2-Step Verification (2-FA) enabled. Let me remind you that you cannot log in to your account using an app password. It can only be used by your apps. It has a higher security level than your normal password. Using your actual password in your code is too risky. Someone can steal your code and have full access to your account.
Here, if you are using gmail smtp server, you can generate a special 16-character app password used for a specific application (like your Node.js app). Before generating an app password, you need to enable 2-Step Verification in your Gmail account. After that, click this :
Google App Password
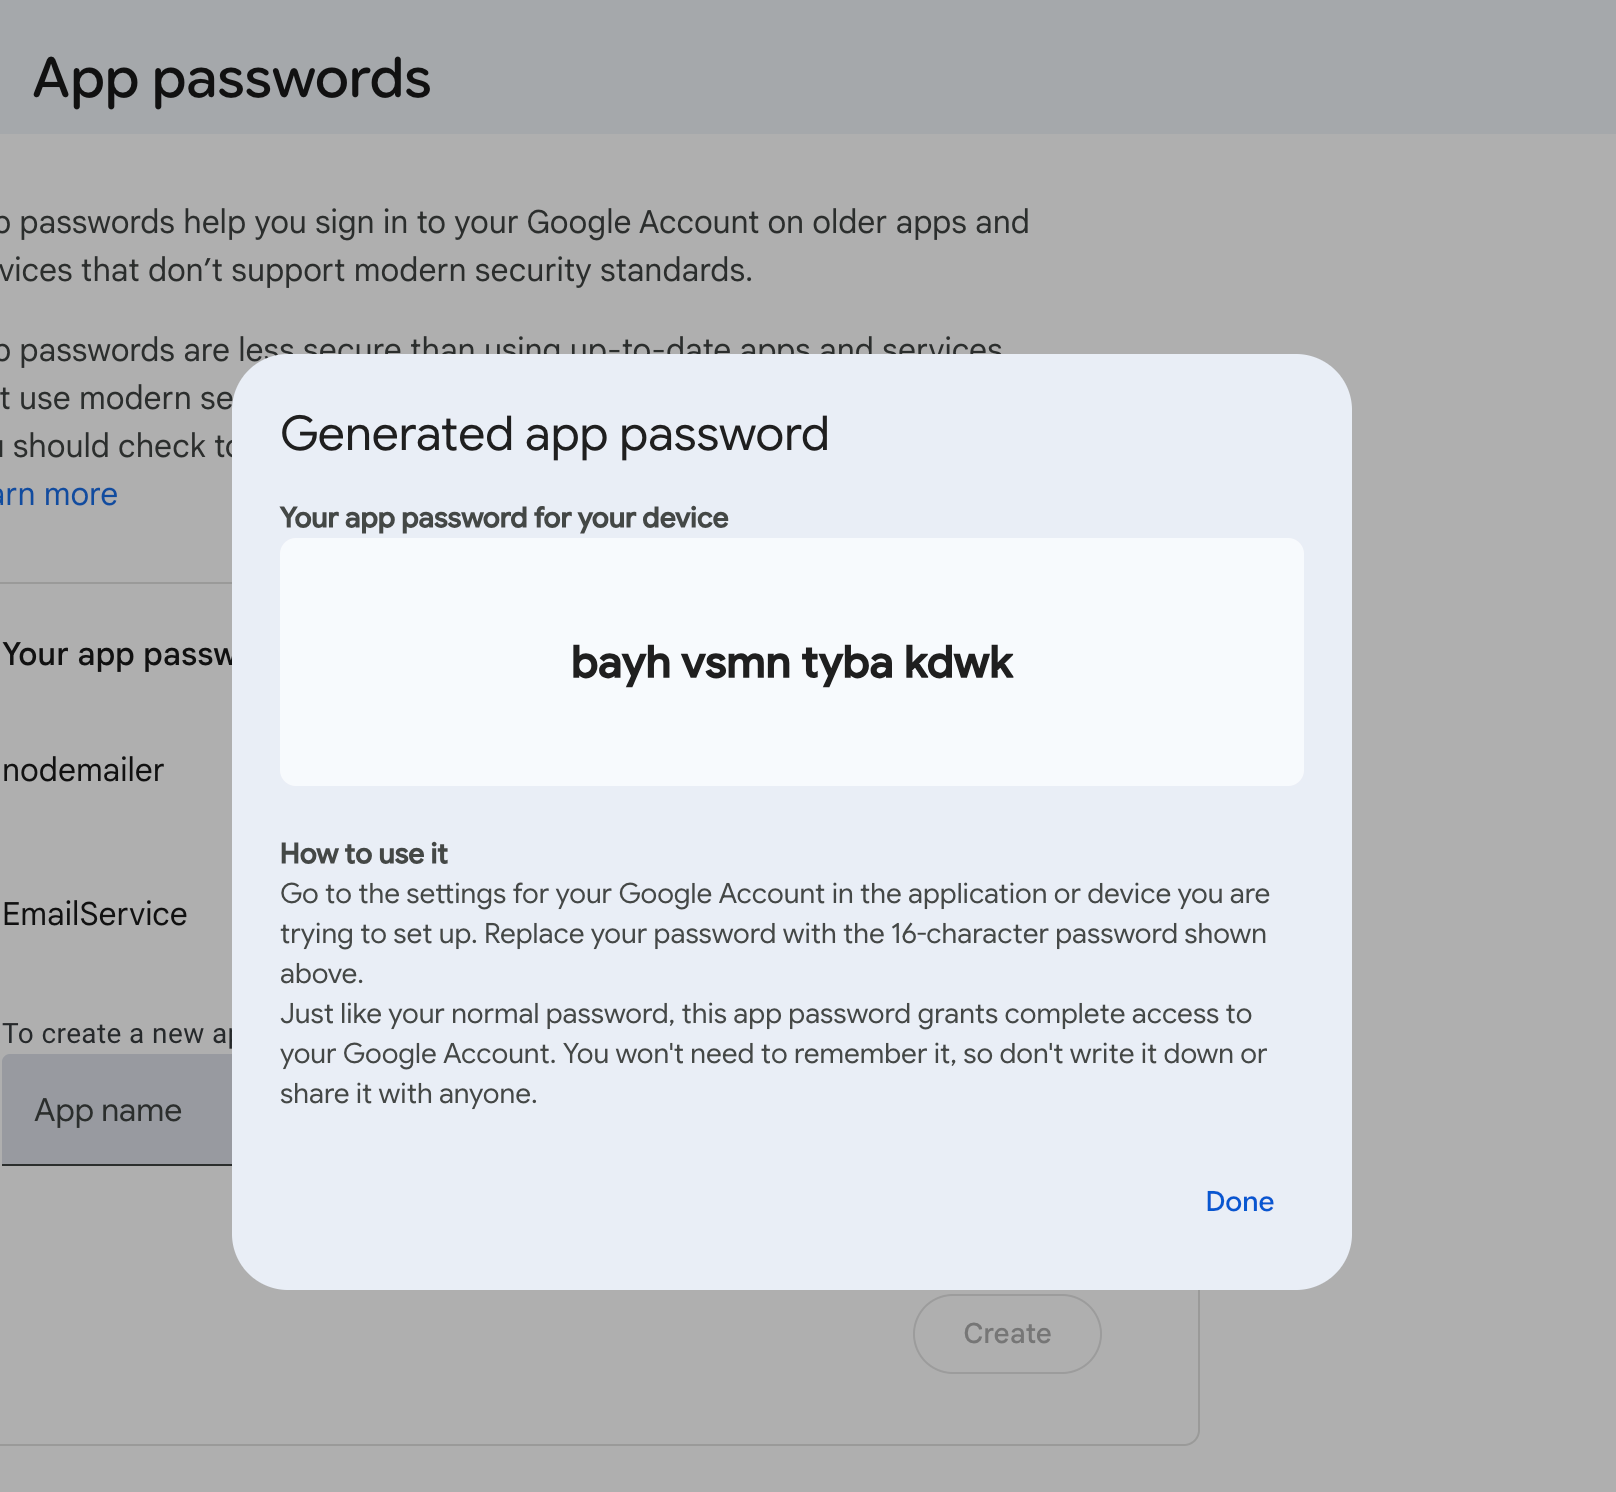
After logging in via 2-FA in the above link, you can create your app password like this:
All done. You are ready to make your own email service. Here is a sample for you to create an email service :
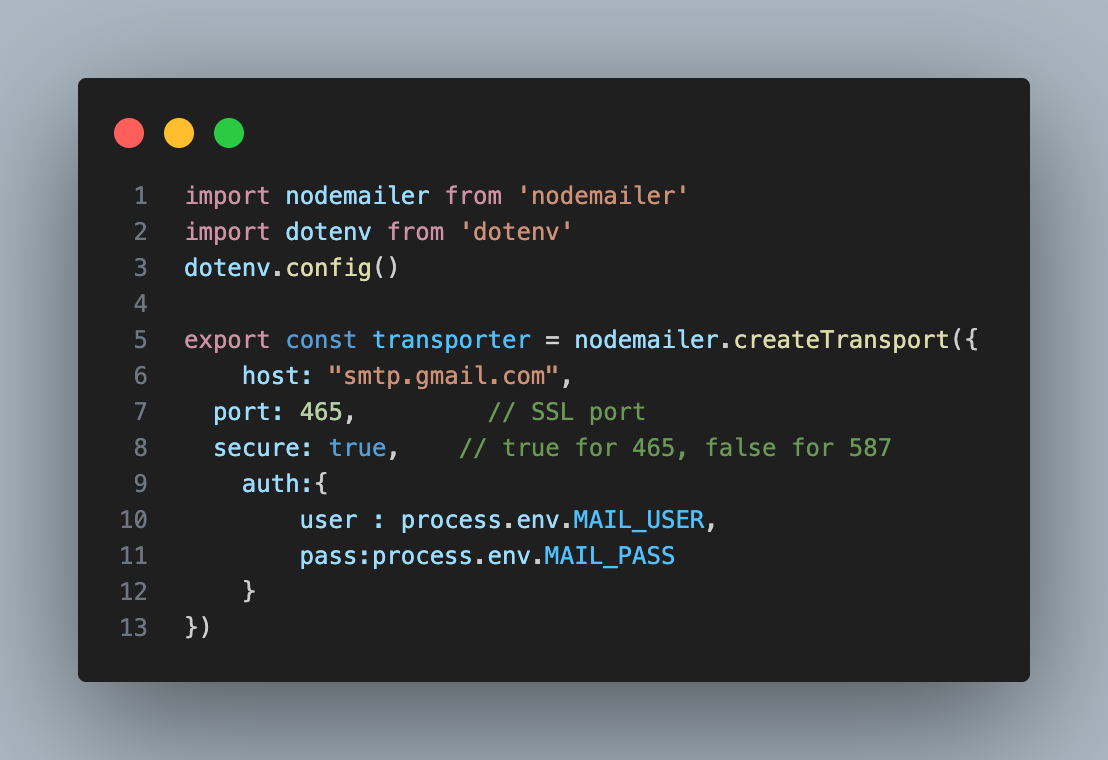
smtp.config.ts
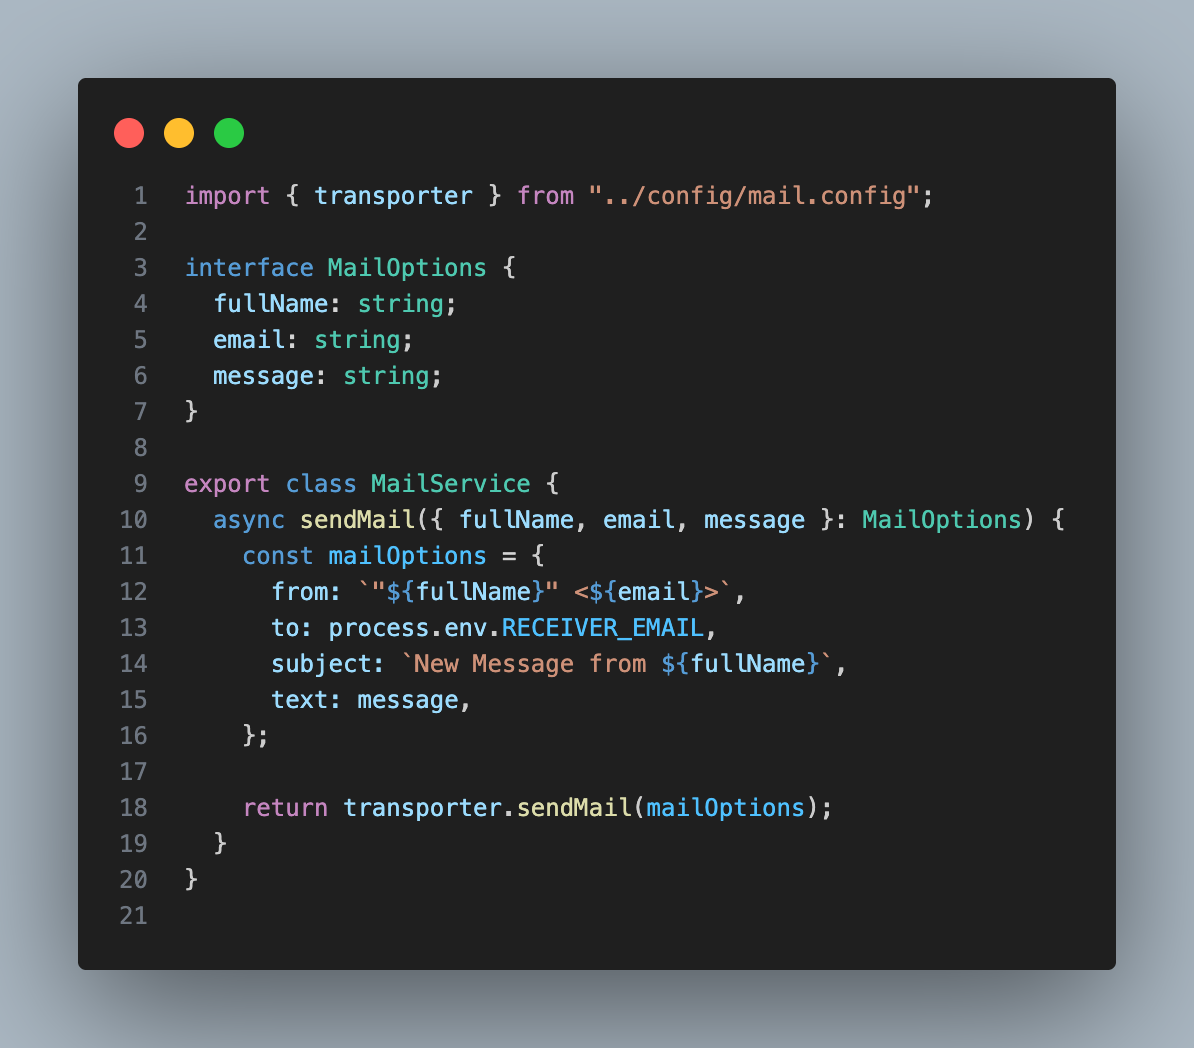
mail.service.ts
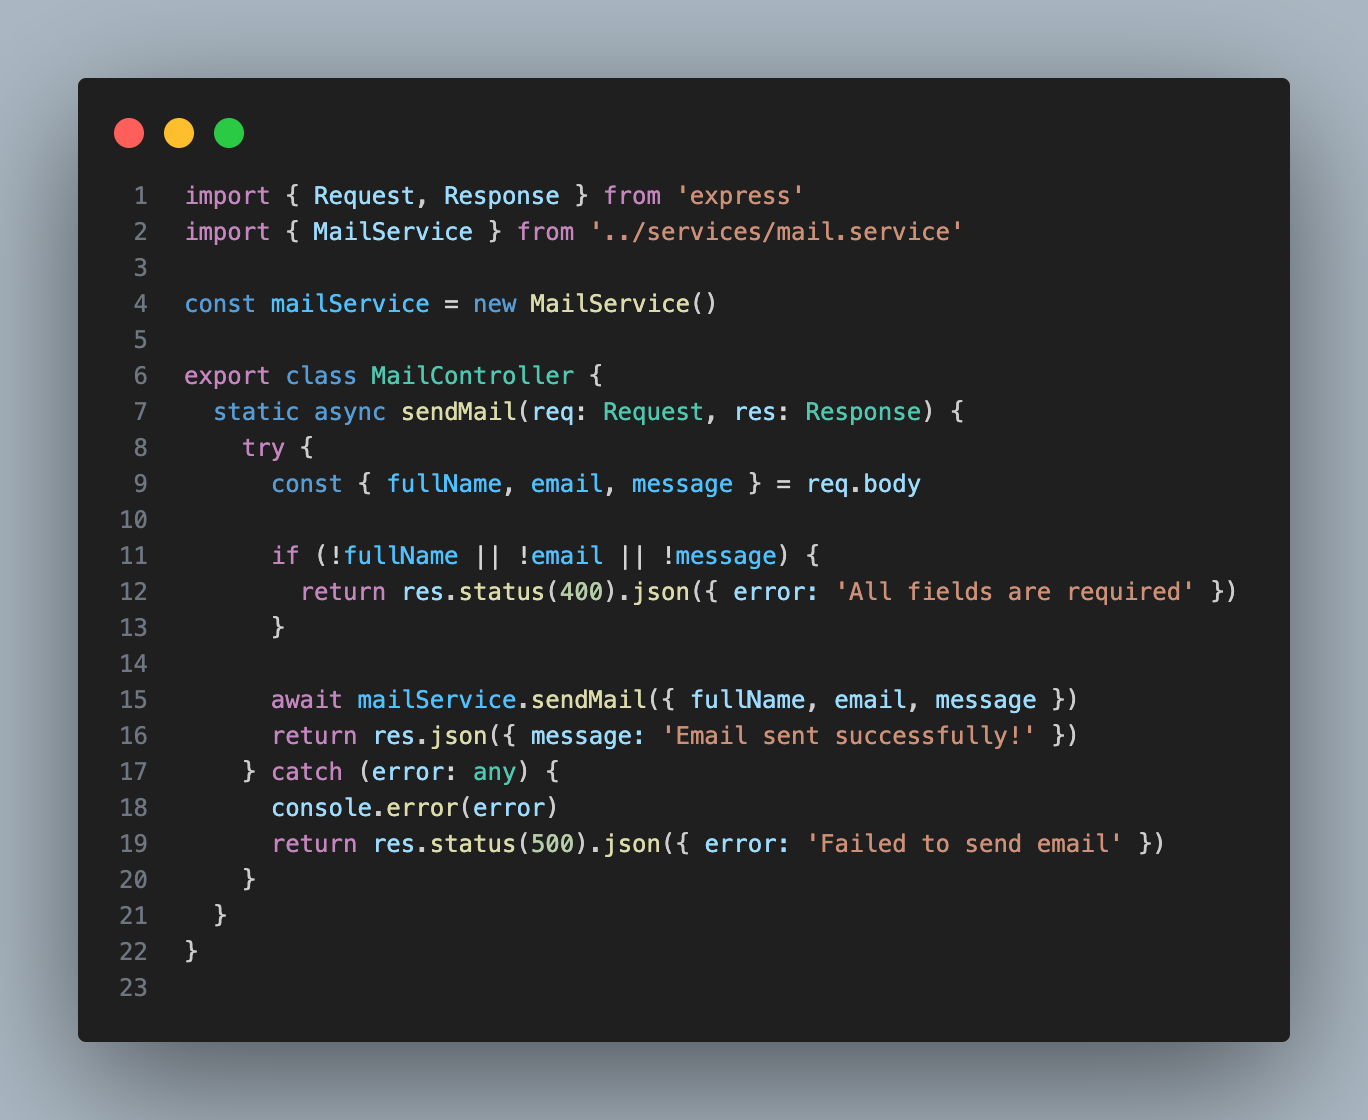
mail.controller.ts
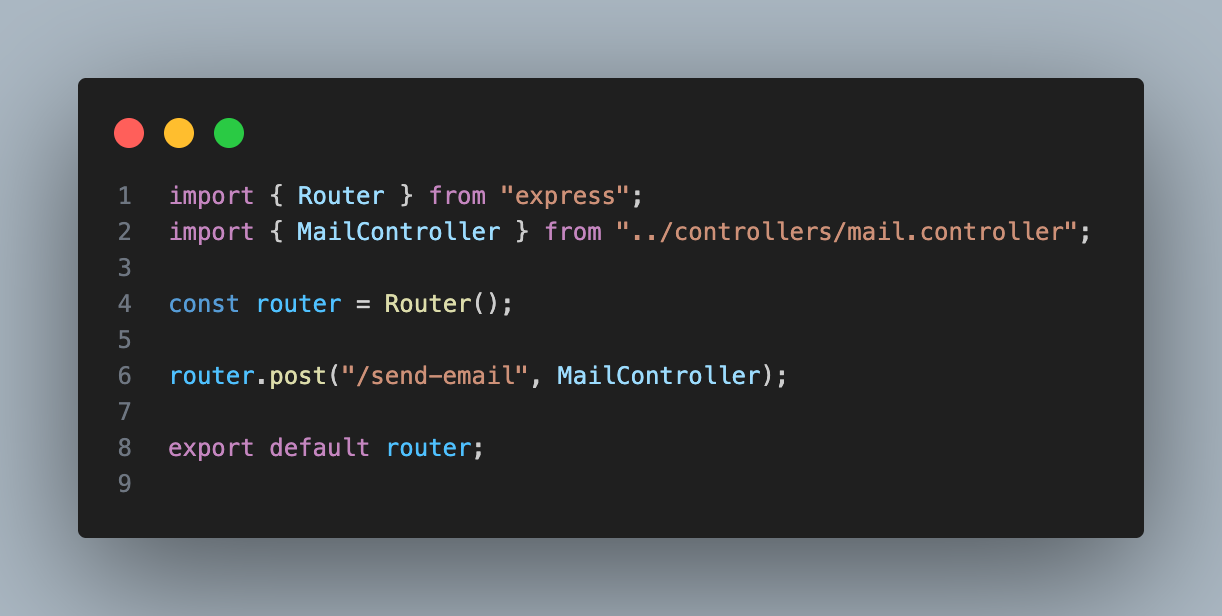
mail.routes.ts
app.ts
server.ts
Things You may need
To run your server via npm run dev or yarn dev, add:
“dev”:” ts-node-dev —respawn —transpile-only src/server.ts”
This script is inside your package.json file, inside script:{}.
.env, don’t share it.MAIL_USER=yourcompany@gmail.com
MAIL_PASS=your_app_password
RECEIVER_EMAIL=yourcompany@gmail.com.env
Happy coding …

Comments ()